I loved the idea of my dolls having a garden their own size. This craft felt like a way to make doll-sized pots accessible, in any color imaginable.
Note the article below contains affiliate links. It helps me out if you use them, no worries in any case.
For this craft, the supplies are pretty basic, but the technique is a little more complex. There is also some air-drying that adds time to the process (and requires some patience). 😊
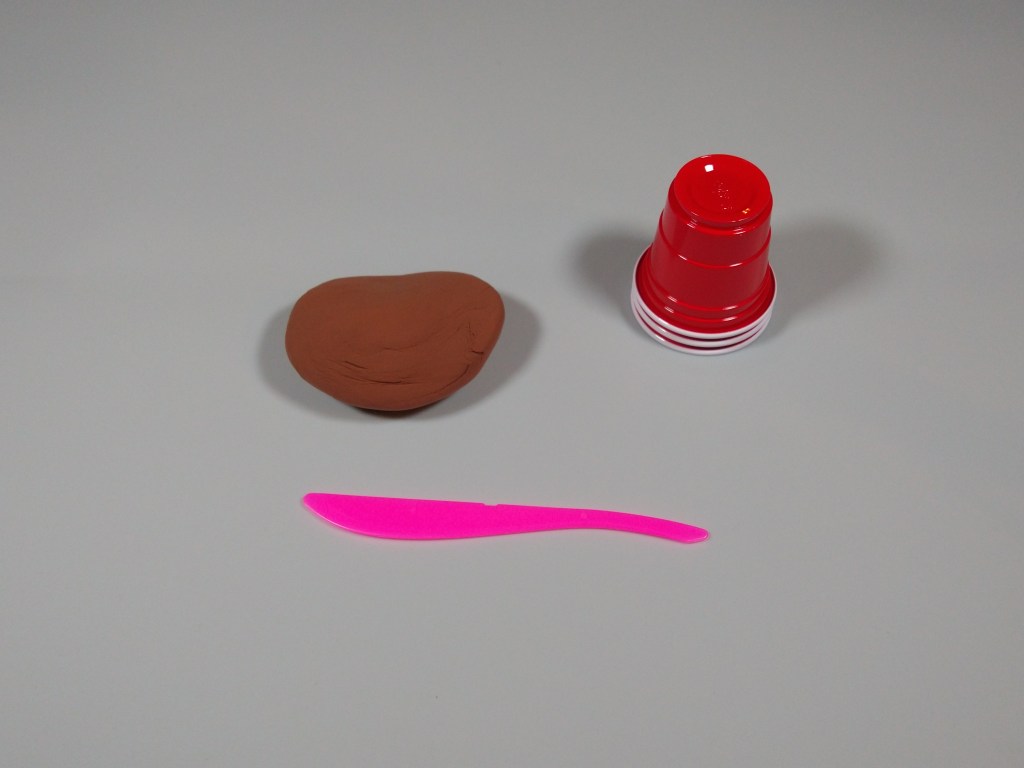
Supplies:

Air-Dry Clay: All kinds of colors are available. I wanted a nice terra-cotta pot color, so I got a clay color that was close and then blended it. It’s also an option to buy white clay and then add food coloring.
2-oz. Plastic Party Cups: These serve as the mold for the pot.
Clay Knife/Smoothing Tool: For a nice finish.
Scissors: For removing the mold
Craft Mat: Helps with clean-up and prevents stains/spills.
Color Mixing Guide: A handy tool that helped me blend several clay colors to get the one I wanted.
Sealant: Finishing touch to make the clay water-resistant.
My Process:
I started by blending a few different colors of clay to get the one I wanted (brown, yellow, and some red). In the end, it perfectly matched one of my real-life terra cotta pots, which I was happy with.
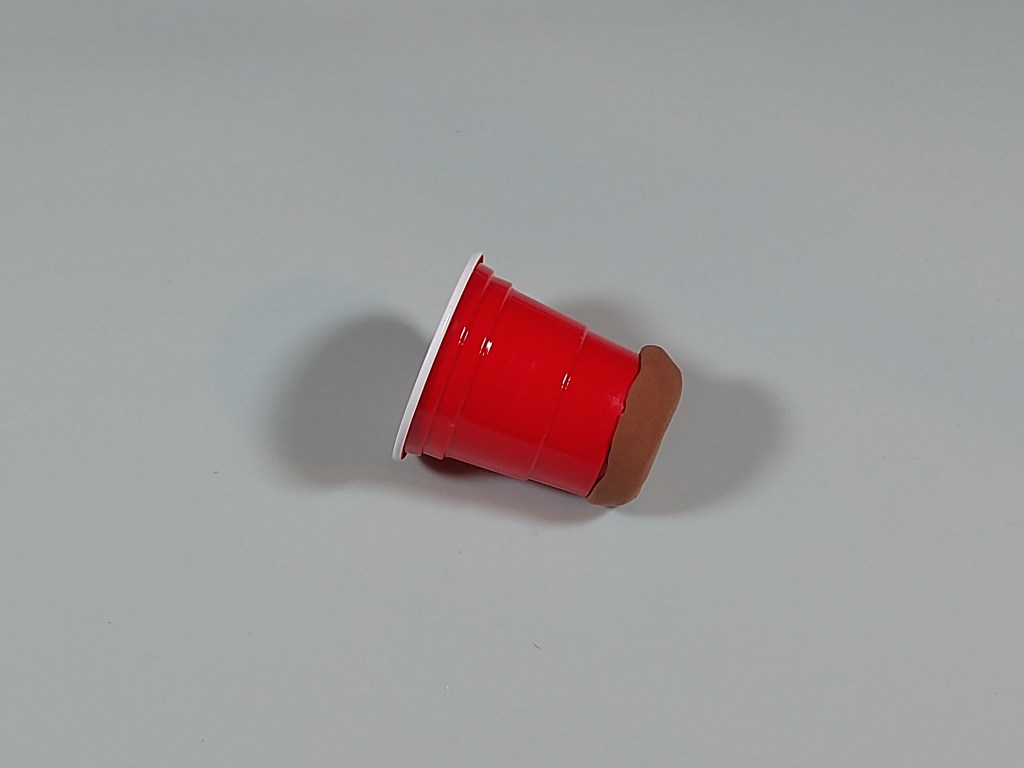
Next, I flattened out the clay and covered one of the cups with the clay disk, working the clay to shape it around the cup.

Once I had a smooth, solid layer of clay, I then took another plastic cup and put it over top of the clay, sandwiching the clay between the two cups. I kept pressing the two cups together to get a firm seal. I found it was also helpful to add another cup or two to the outside, for a little more reinforcement.

Now, some of the clay squeezed out in the process of sealing the mold. Next I took the clay knife and trimmed away the excess clay, aiming to get a nice, clean edge on what would be the top rim of my pot.

I let that set for a few days.
Before then, I took the excess clay and made a base for the pot. Forming a small disk of clay, I molded it to the base of another plastic cup.
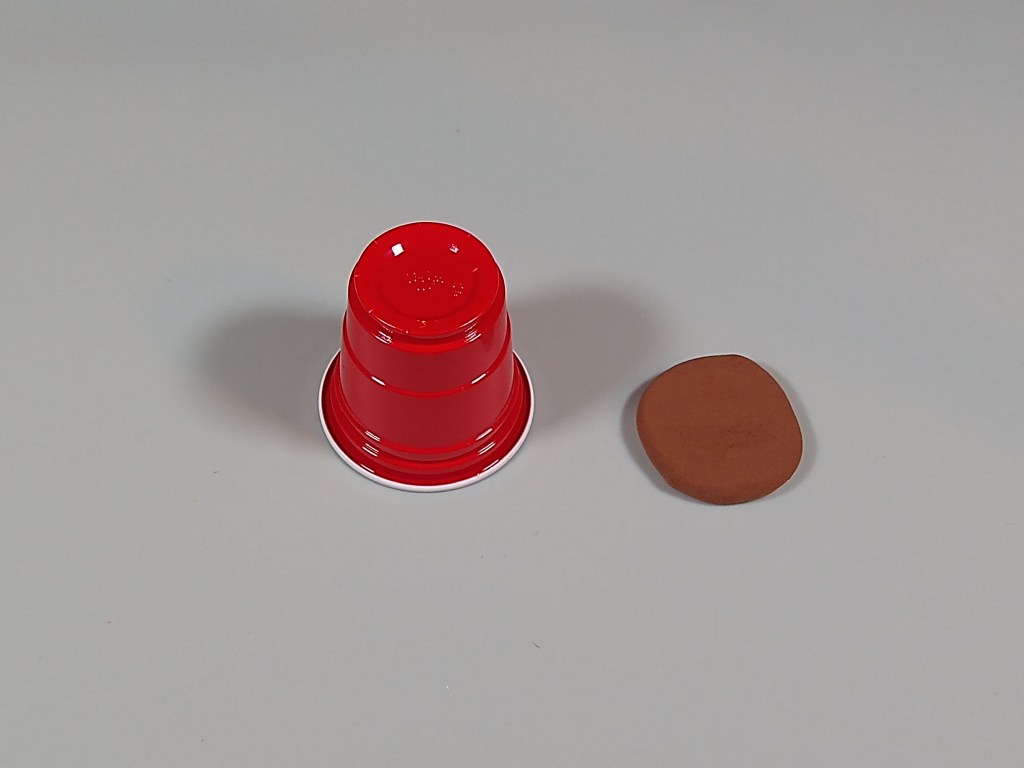
I gently peeled the base off the cup, and then used a shaping tool to smooth the top rim and widen the base just slightly. I wanted the base to be just slightly larger than the pot. Then I let that dry for a day or two.
Back to the pot….
After a couple days of dry time, I set about removing the pot from the mold without damaging the pot. Due to tight seal of the mold, not all of the clay would have air-dried by this time. From a couple iterations of testing this craft, I learned that if at any point the clay seems sticky or doesn’t easy detach from the mold, it’s best to let it air dry for another day and try again then.
I started with the inner cup. I made six small equally-spaced cuts around the top of the cup, and then gently peeled back one piece of the cup at a time.
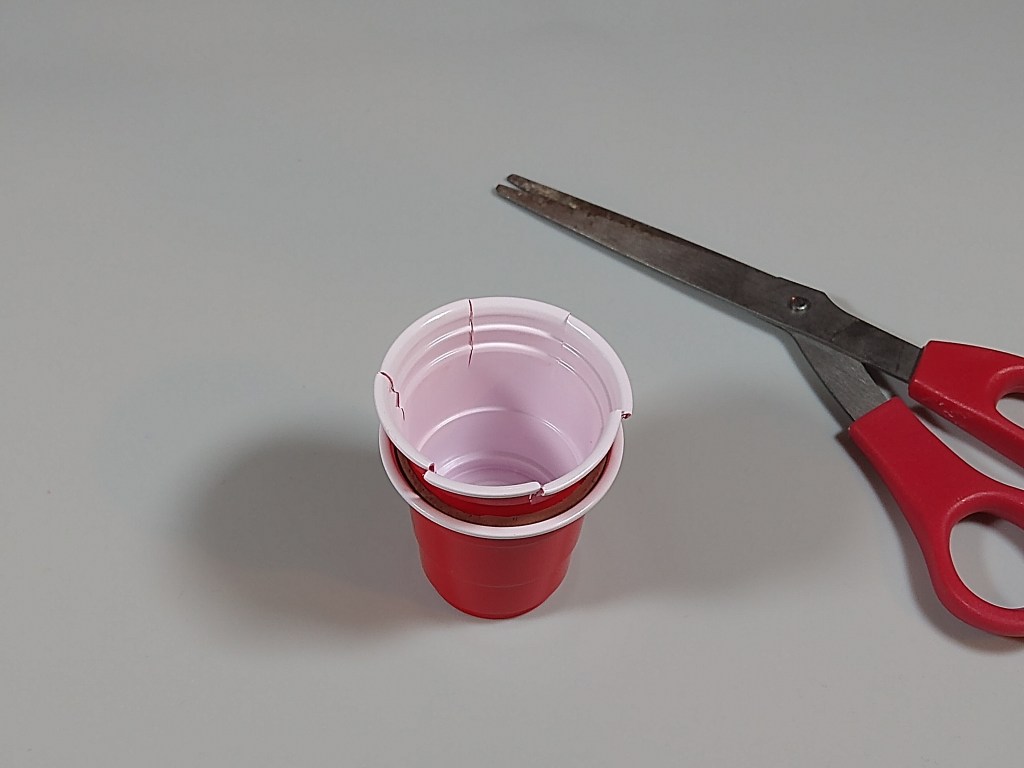
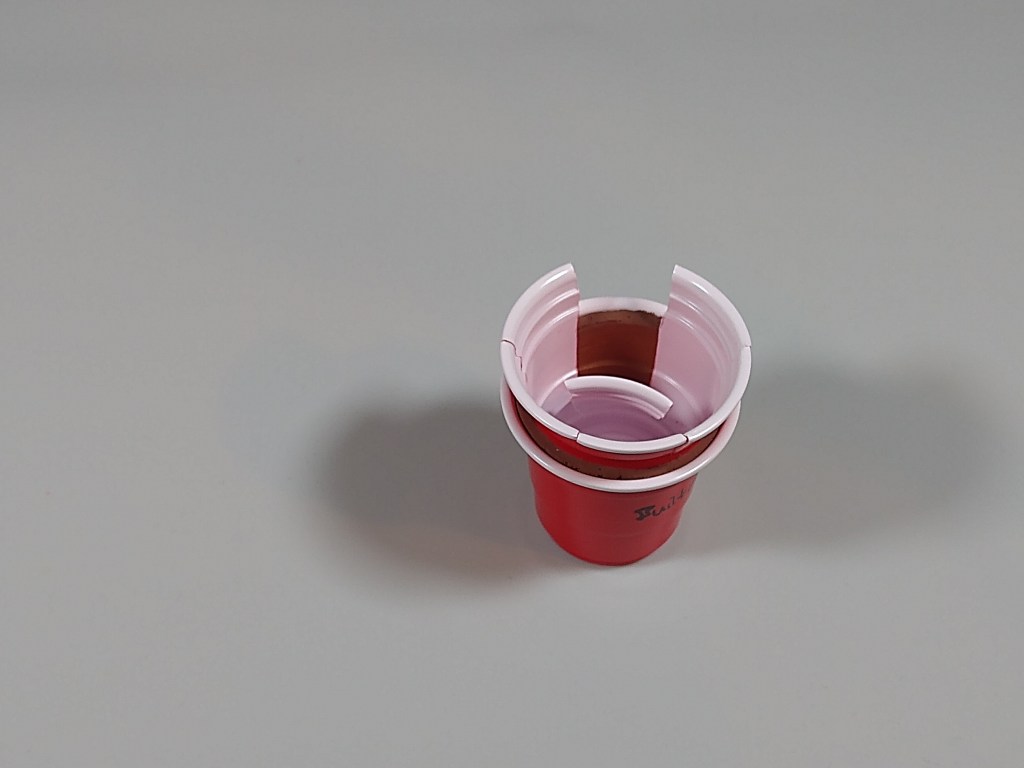
I then trimmed this plastic piece with scissors.

I repeated this process with the remaining five sections.
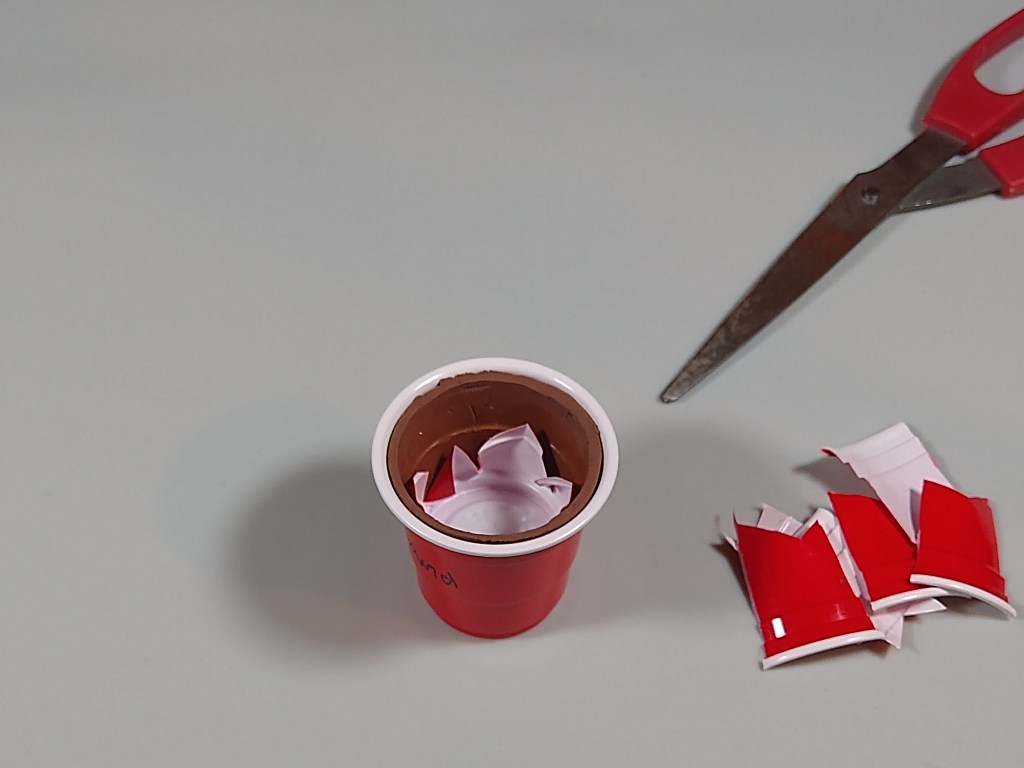
With the bulk of the cup removed, the remaining bottom section lifted out easily.
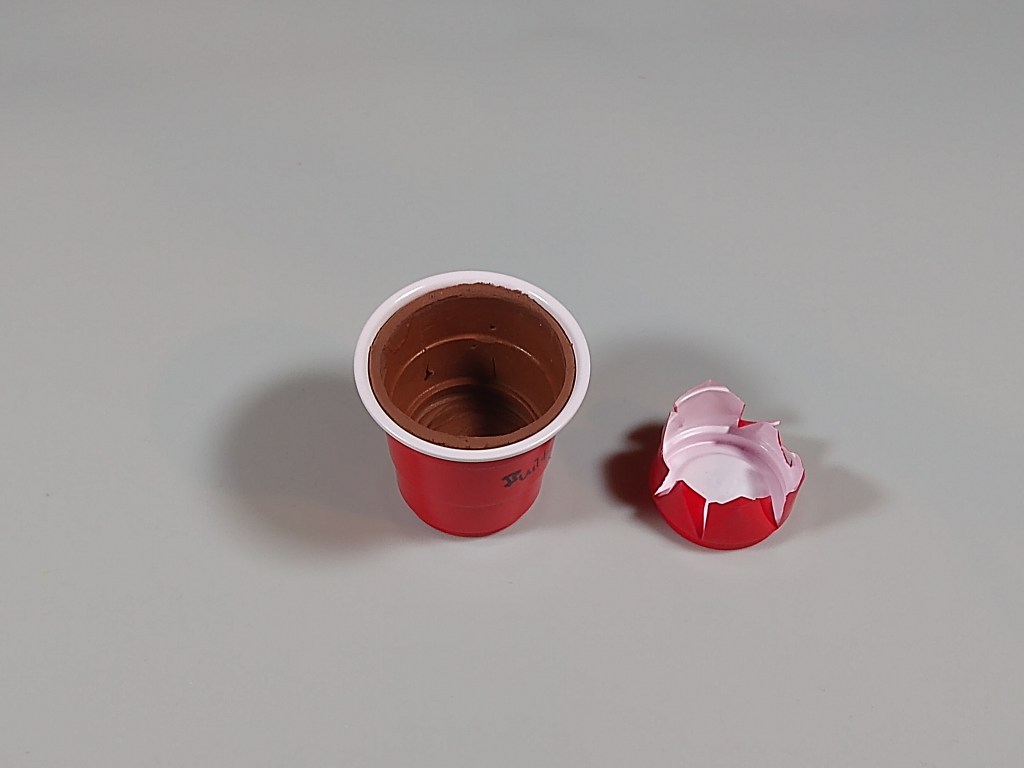
Now I repeated a similar process for the outer cup, making six cuts around the top rim of the cup, and peeling back each layer.
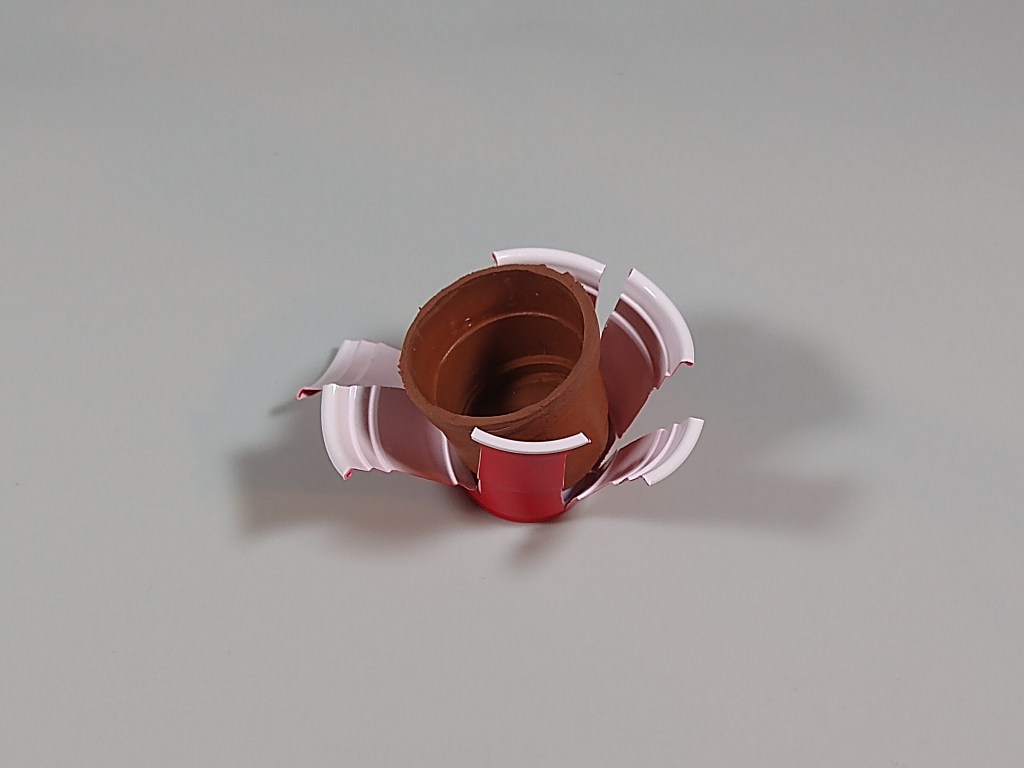
With that, the clay pot popped right out. I gave it some more air-dry time, and that was it!
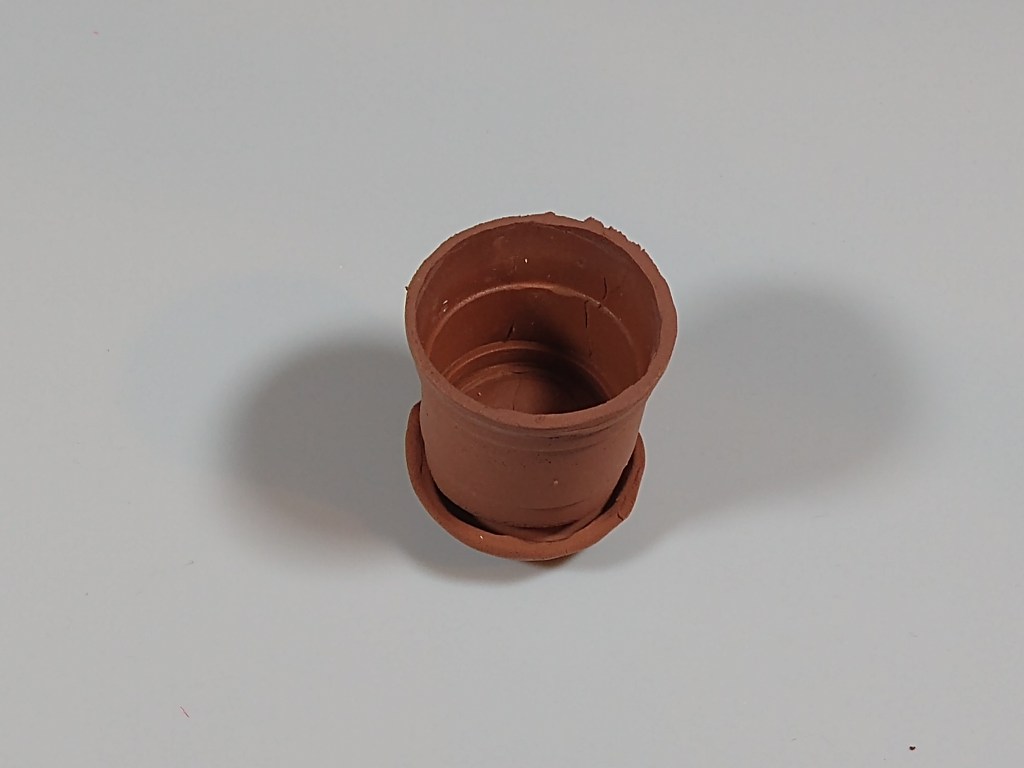
Follow up note on this pot: I learned the hard way that air-dry clay is not water resistant. ☺️ I tried another version and applied a sealant to help with waterproofing. I’m currently experimenting with using that pot in my doll’s garden. Stay tuned!
This was fun and challenging. Thanks for visiting, and happy crafting!

![DIY Mini Egg Chair Swing Stand [6:1 Fashion Doll Scale]](https://makeitmyowncrafts.com/wp-content/uploads/2025/05/snapshot-6.jpg?w=1024)
![DIY Mini Egg Chair Cushion [6:1 Fashion Doll Scale]](https://makeitmyowncrafts.com/wp-content/uploads/2025/05/snapshot-5.jpg?w=1024)
![DIY Mini Egg Chair Swing [6:1 Fashion Doll Scale]](https://makeitmyowncrafts.com/wp-content/uploads/2025/05/img_20250525_114014199.jpg?w=1024)
![DIY Mini Garden Bench [6:1 Fashion Doll Scale]](https://makeitmyowncrafts.com/wp-content/uploads/2025/05/img_20250519_191541270.jpg?w=1024)
![DIY Mini School Window [6:1 Fashion Doll Scale]](https://makeitmyowncrafts.com/wp-content/uploads/2025/05/img_20250520_115912364.jpg?w=1024)
![DIY Mini Split-Rail Fence [6:1 Fashion Doll Scale]](https://makeitmyowncrafts.com/wp-content/uploads/2025/05/img_20250518_105522853.jpg?w=1024)

Leave a comment