I wanted to build out some dollhouse sets with adjustable windows. This is what came up.
Note the article below contains affiliate links. It helps me out if you use them, no worries in any case.
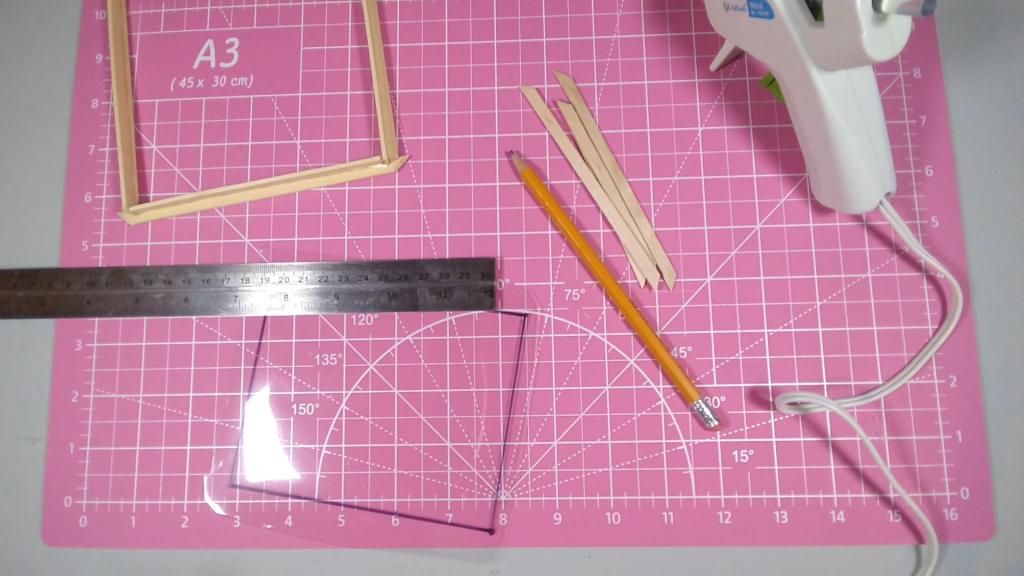
Supplies:
- Bamboo Craft Sticks, 15.7″ long: These make up the frame and trim.
- Wooden Coffee Stirrers, 7.5″ long: These frame the window panes themselves.
- Wide Craft Sticks, 6″ long: This forms the window sill.
- Thin Plastic Sheet: I used the top of a clamshell takeout container.
- Hot Glue Gun, Scissors, Craft Mat, Cutting Board, Drop Cloth/Rag, Foam Brush, Wood Stain/Paint, Mounting Putty
My Process:
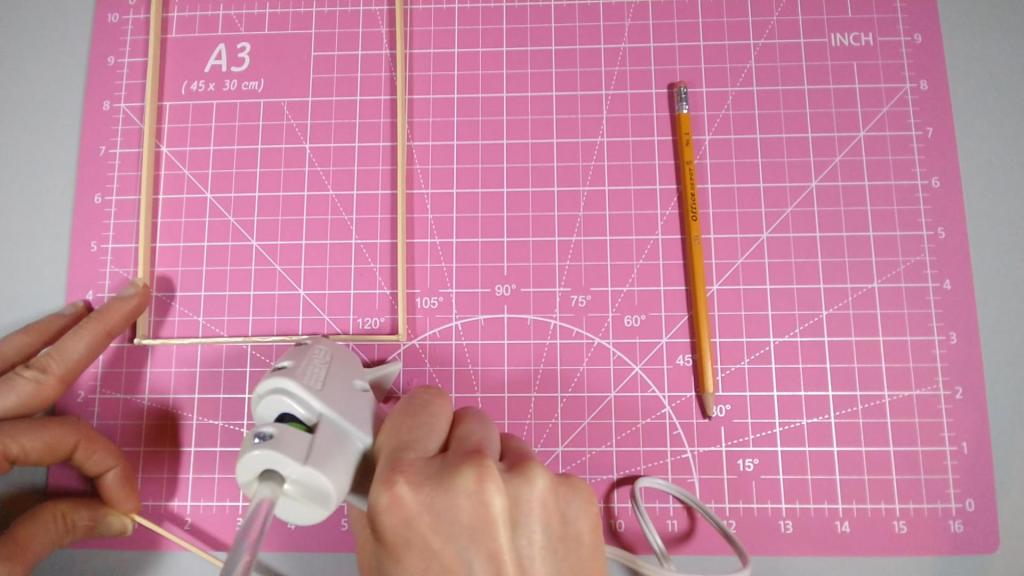
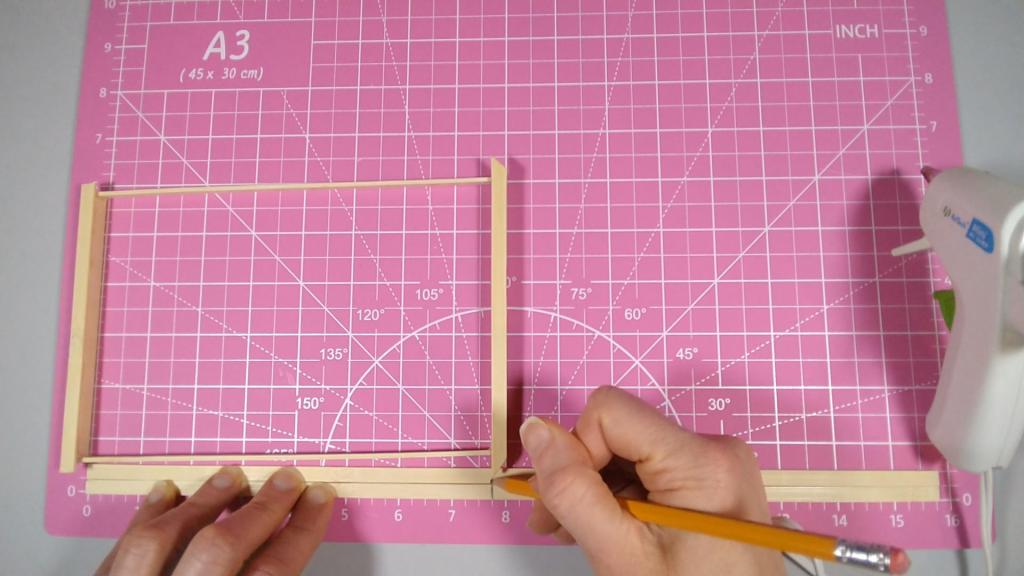
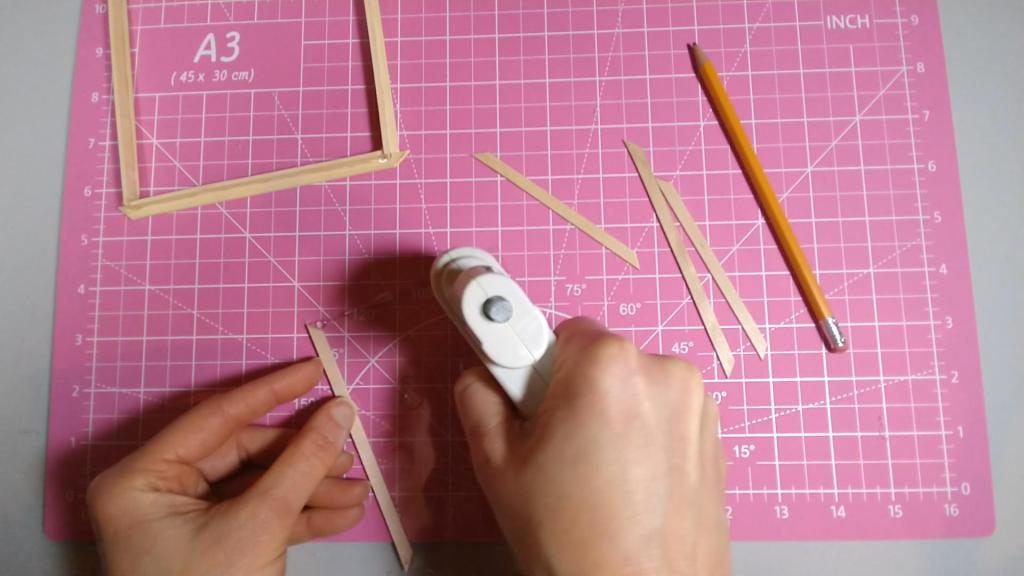
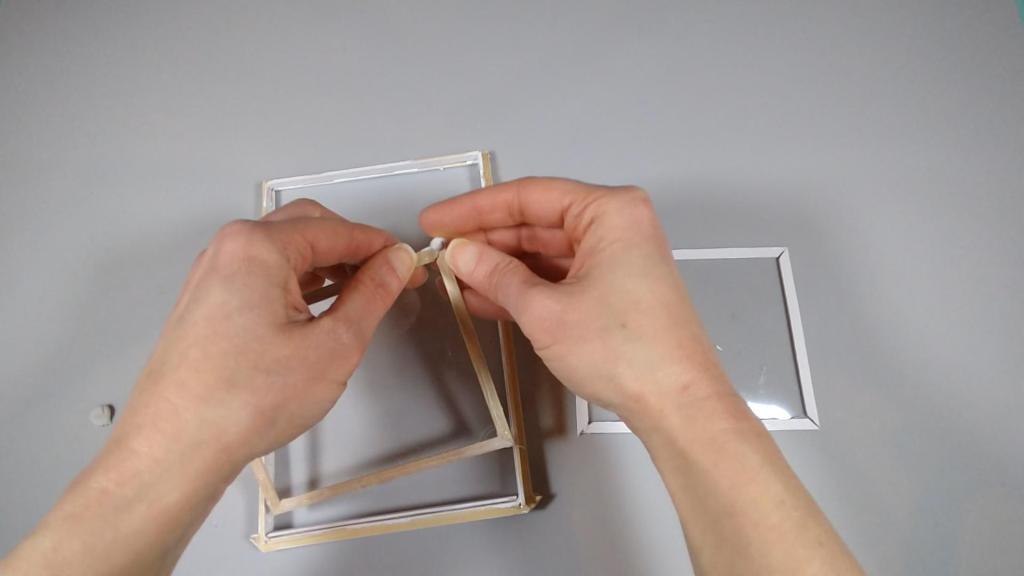
First, I took two bamboo craft sticks and measured 8″ and 5″ from each end. I cut along these lines so I had two 8″ sections and two 5″ sections.
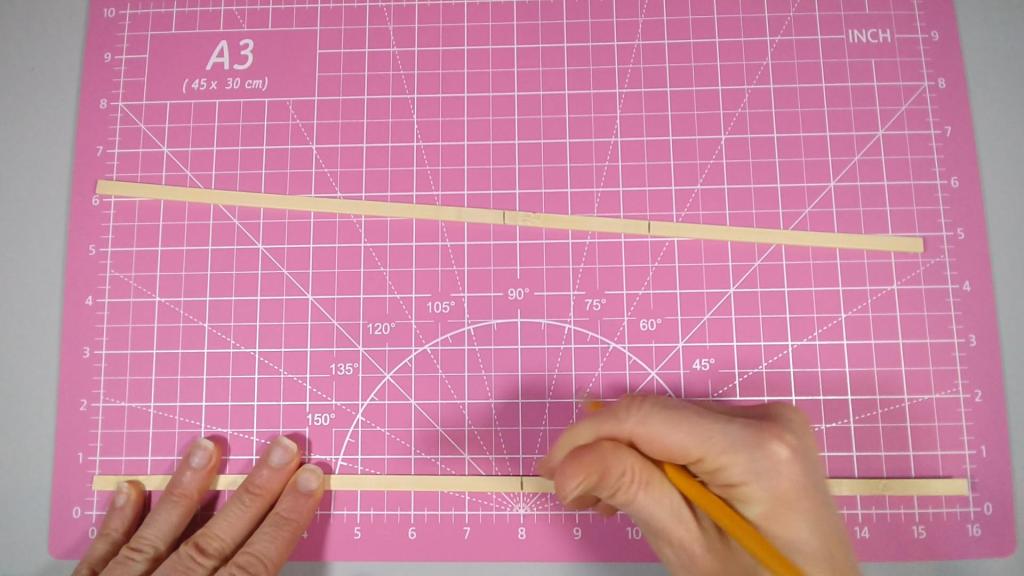
Next, I glued each piece together at the ends to form a rectangular window frame.


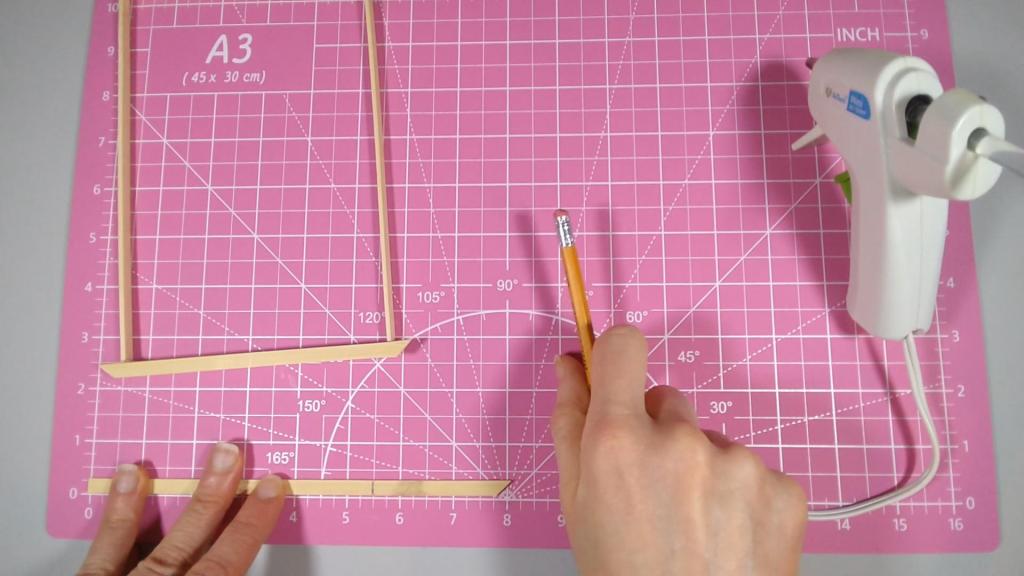
Next, I cut another bamboo craft stick, marking it 6″ long with cuts at 45 degree angles.
I glued this along the base of the rectangle to form a decorative trim.

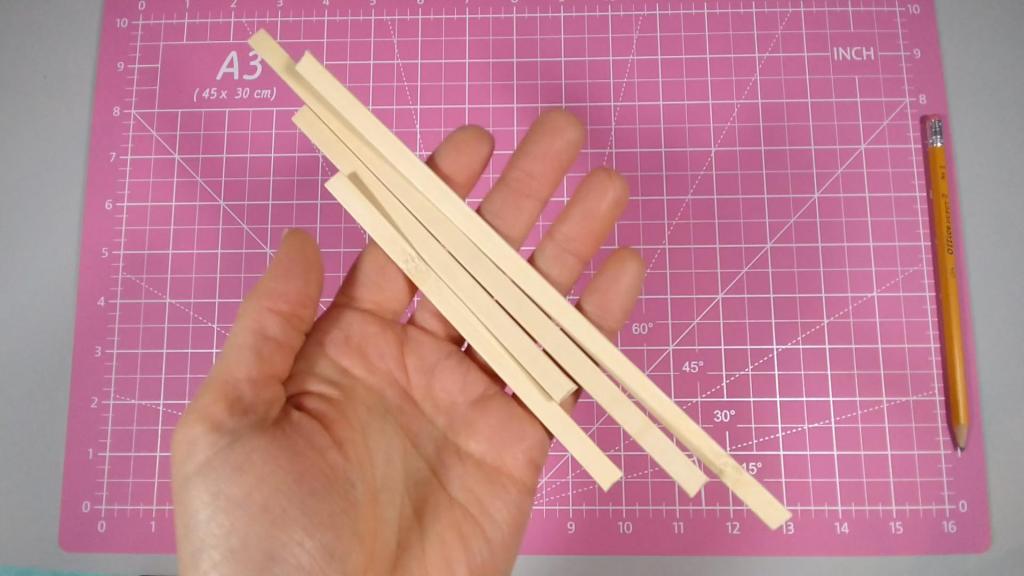
Next I measured and cut another bamboo section of 5.5″.
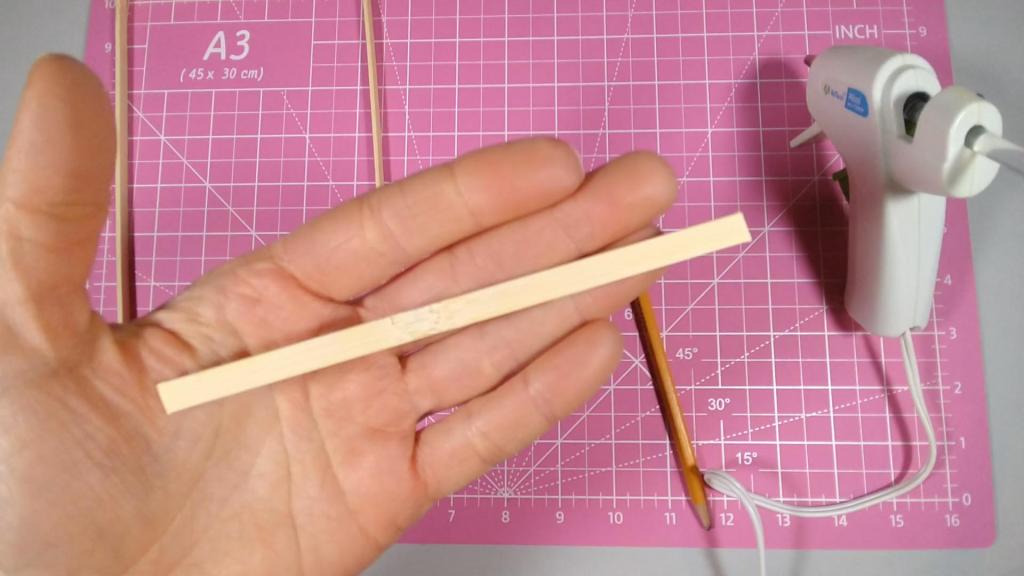
I glued this in place along the top of the window frame.

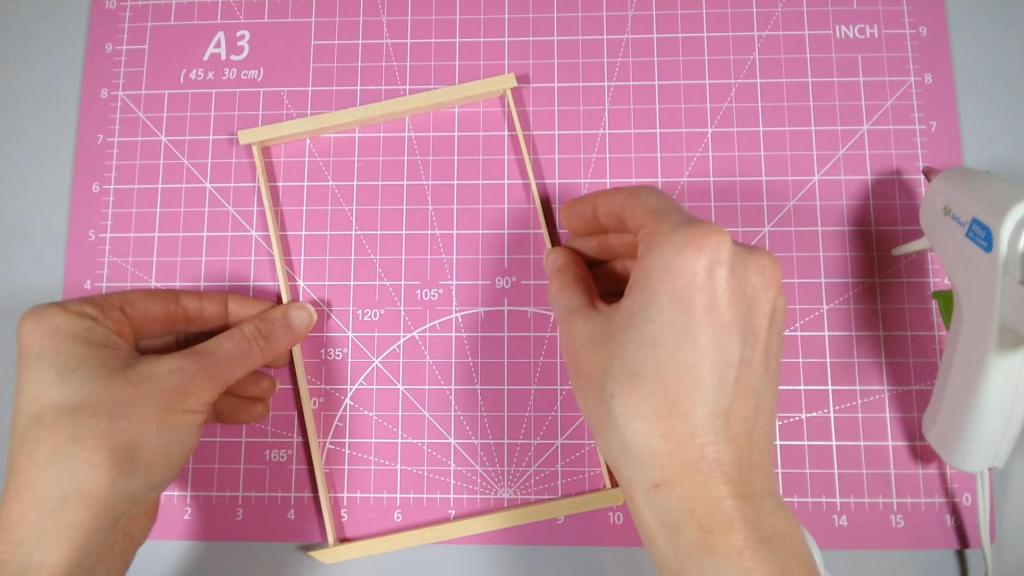
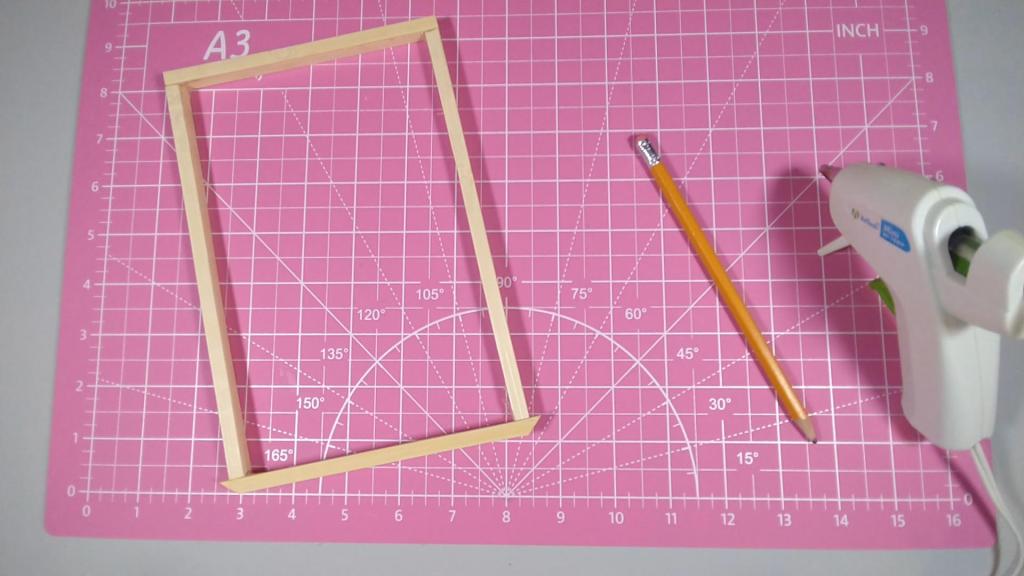
Next, I measured and cut two bamboo sticks 7.75″.

I glued these to the sides of the window.
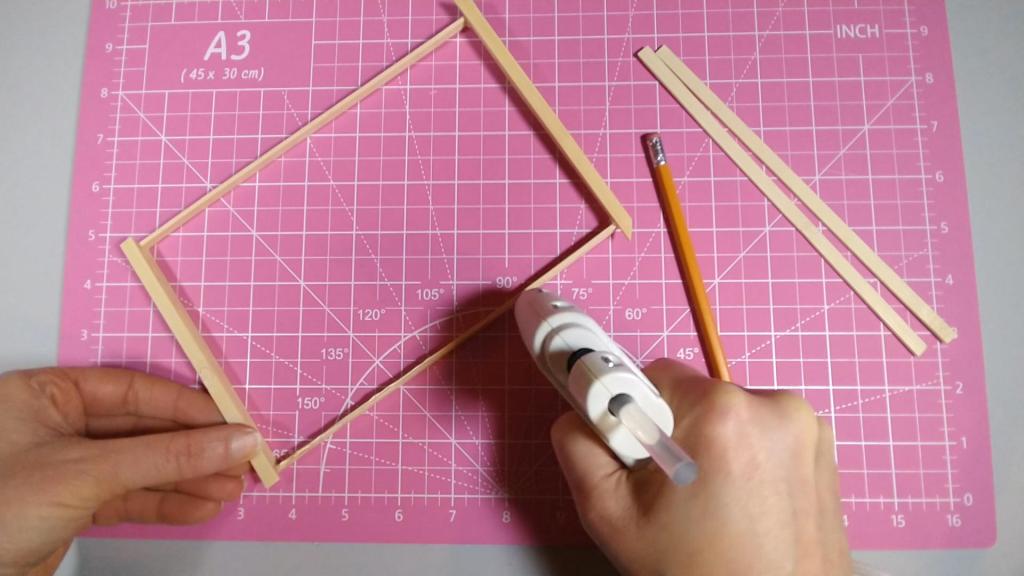
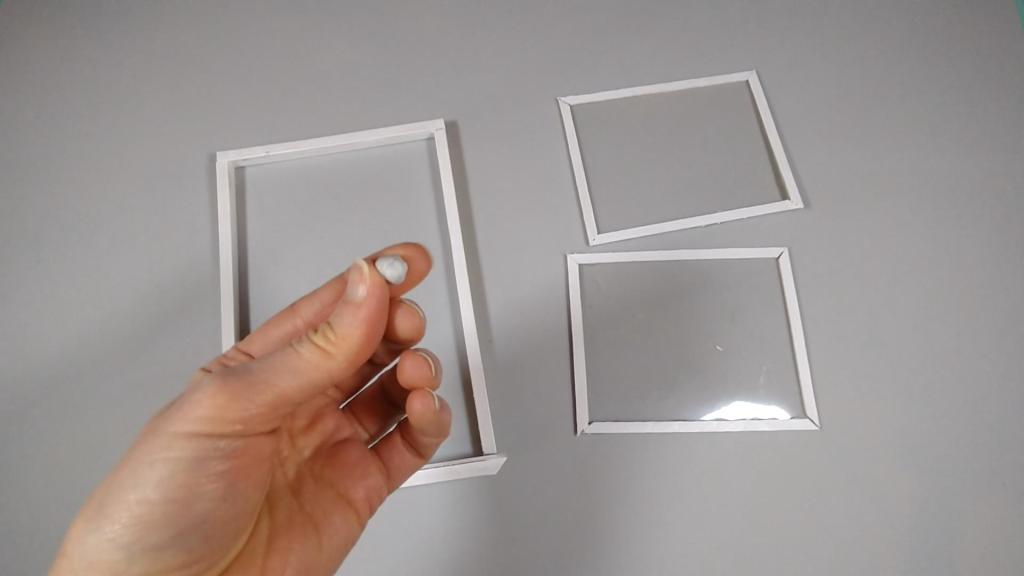
Now, it was time to work on the window sashes. I took four coffee stirrers, measured two 4″ long and the other two 5″ long, all with cuts at 45 degree angles. I cut the coffee stirrers with scissors.
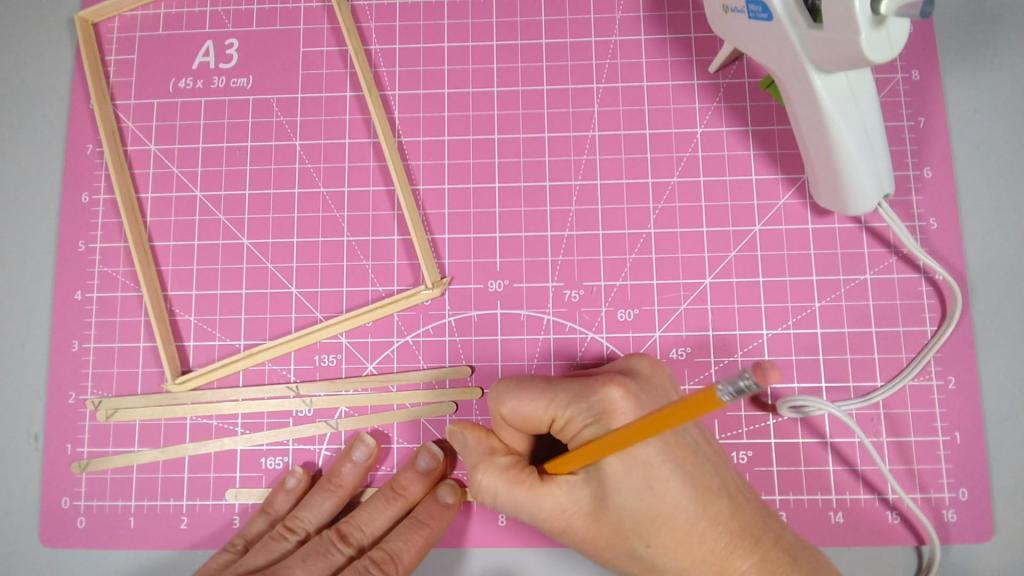

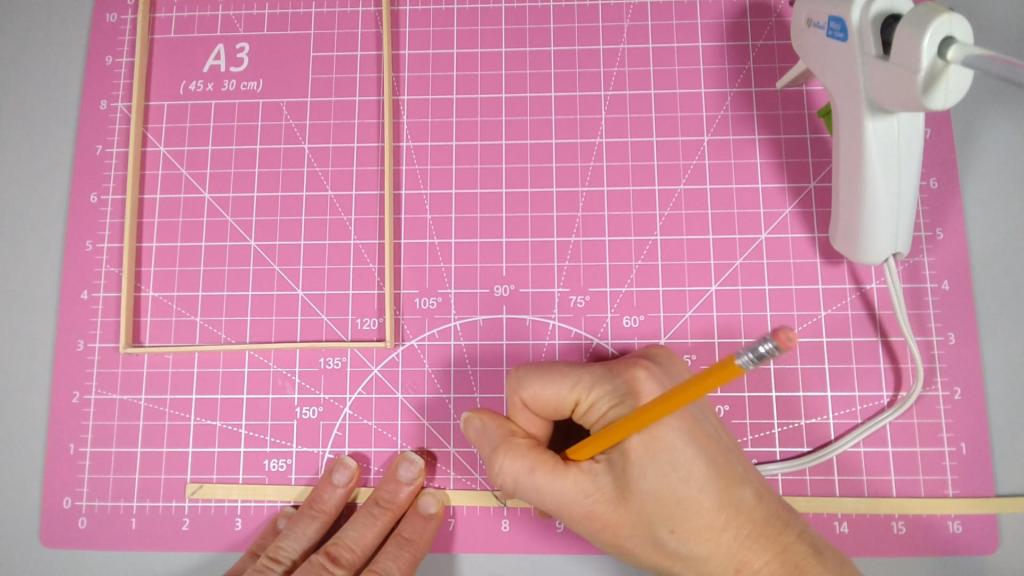
Next, I took my thin plastic sheet, and measured and cut a 4″ x 5″ rectangle.

I glued the coffee stirrer pieces around the edge of the plastic to form a frame.

I repeated this process to create a second sash.
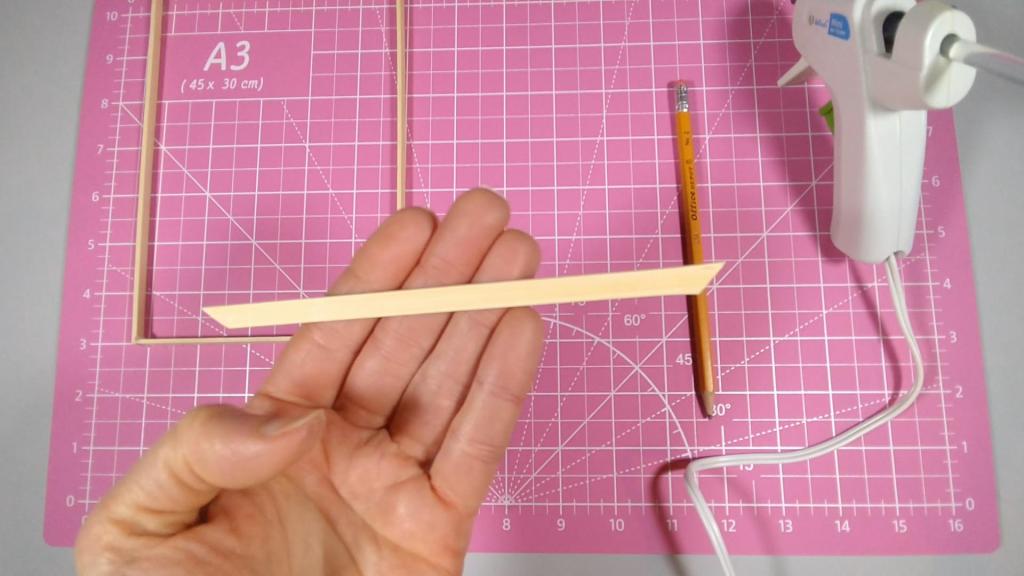
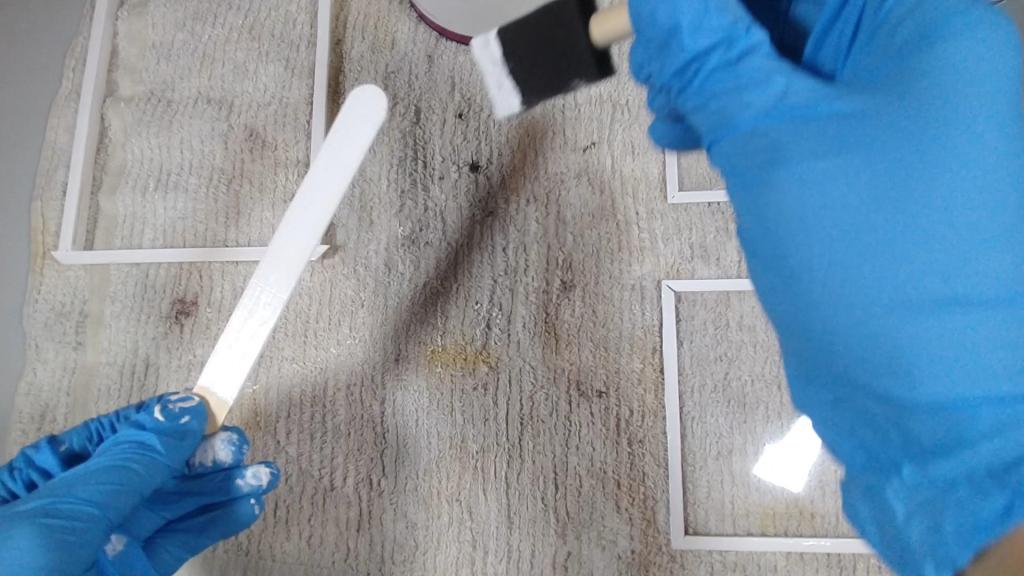
Next, I painted the window frame, sashes, and one wide craft stick for the window sill that I forgot to glue on earlier. ☺️
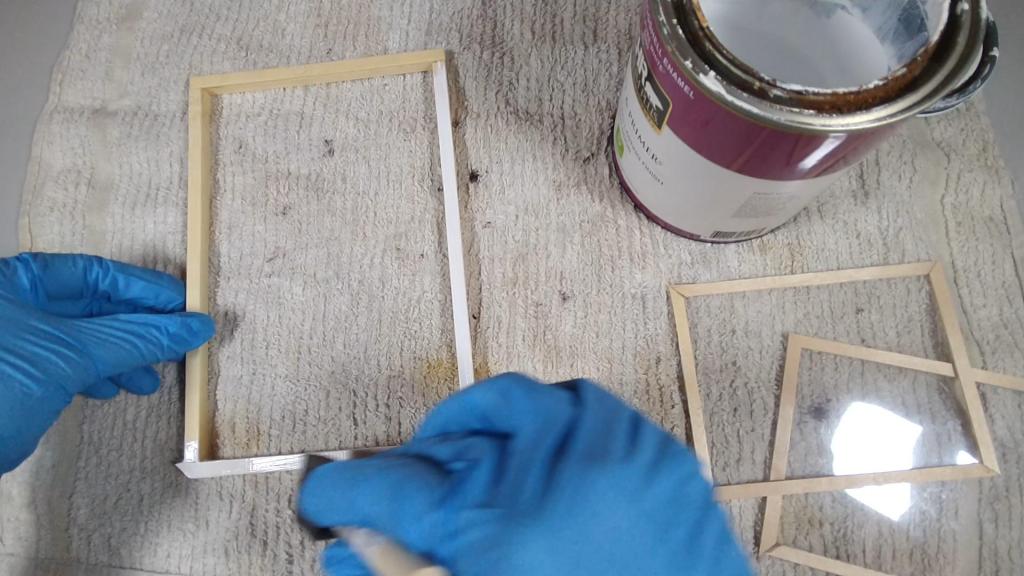
Once the paint was dry, I marked the wide craft stick to fit inside the frame as window sill piece.


I cut and glued this piece along the bottom of the window frame.


Finally, to “install” the window sashes, I took a small piece of mounting putty and adhered it to the top corners of one of the window sashes.
I pushed the sash into the top of the frame until it stuck.

For the second sash, I adhered a couple pieces of mounting putty to the top corners, and pressed it to the base of the top window.

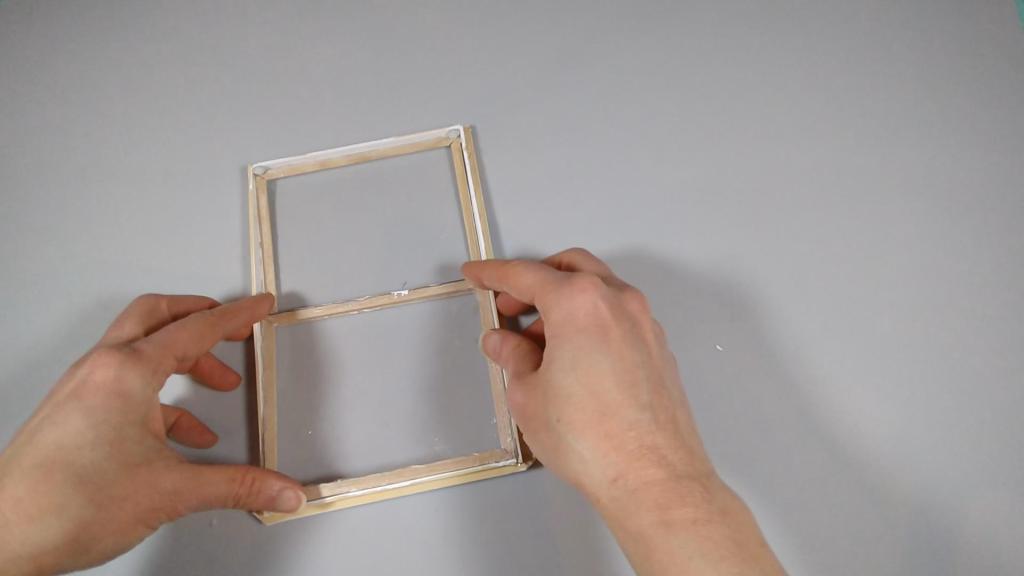
I plan to adjust these positions later when I want to open/close the window. With that, my window was complete!
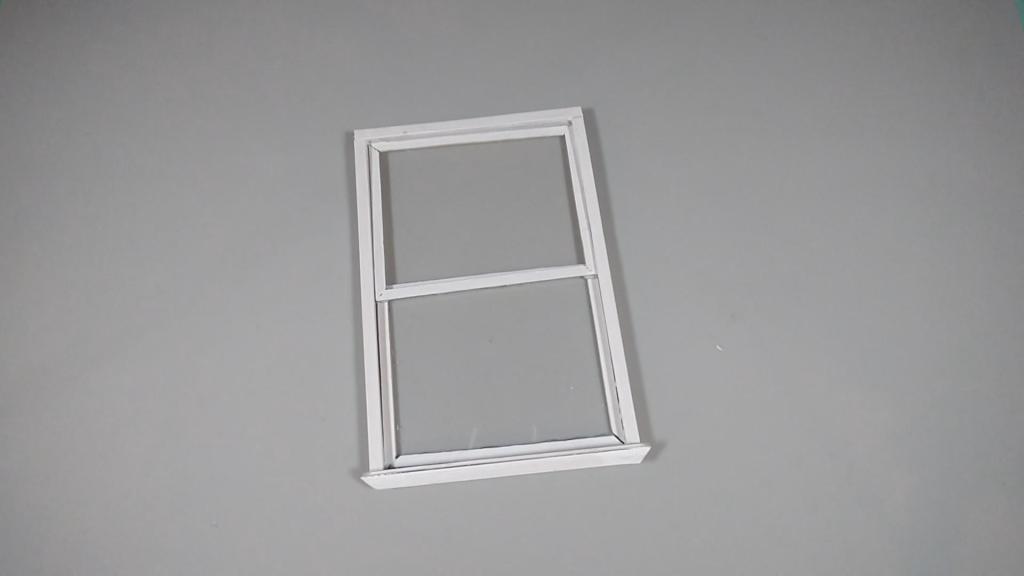
To make it part of a dollhouse set, I took some cardboard and cutout a 8″ x 5.25″ hole and dropped it in. I look forward to trying similar crafts going forward. Stay tuned!
Thanks for visiting, and happy crafting!

![DIY Mini Egg Chair Swing Stand [6:1 Fashion Doll Scale]](https://makeitmyowncrafts.com/wp-content/uploads/2025/05/snapshot-6.jpg?w=1024)
![DIY Mini Egg Chair Cushion [6:1 Fashion Doll Scale]](https://makeitmyowncrafts.com/wp-content/uploads/2025/05/snapshot-5.jpg?w=1024)
![DIY Mini Egg Chair Swing [6:1 Fashion Doll Scale]](https://makeitmyowncrafts.com/wp-content/uploads/2025/05/img_20250525_114014199.jpg?w=1024)
![DIY Mini Garden Bench [6:1 Fashion Doll Scale]](https://makeitmyowncrafts.com/wp-content/uploads/2025/05/img_20250519_191541270.jpg?w=1024)
![DIY Mini School Window [6:1 Fashion Doll Scale]](https://makeitmyowncrafts.com/wp-content/uploads/2025/05/img_20250520_115912364.jpg?w=1024)
![DIY Mini Split-Rail Fence [6:1 Fashion Doll Scale]](https://makeitmyowncrafts.com/wp-content/uploads/2025/05/img_20250518_105522853.jpg?w=1024)

Leave a comment