I saw a friend of mine wear a life-sized version of this necklace years ago, and it was striking. I thought it would also make an impression in miniature.
Note the article below contains affiliate links. It helps me out if you use them, no worries in any case.
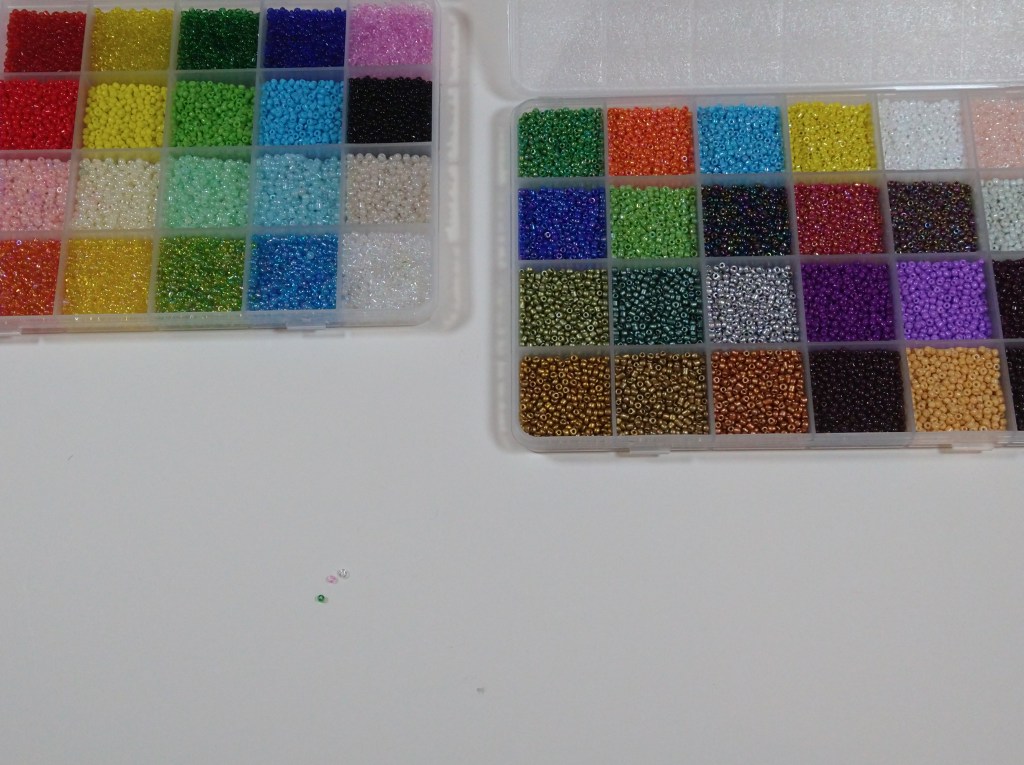
Supplies:
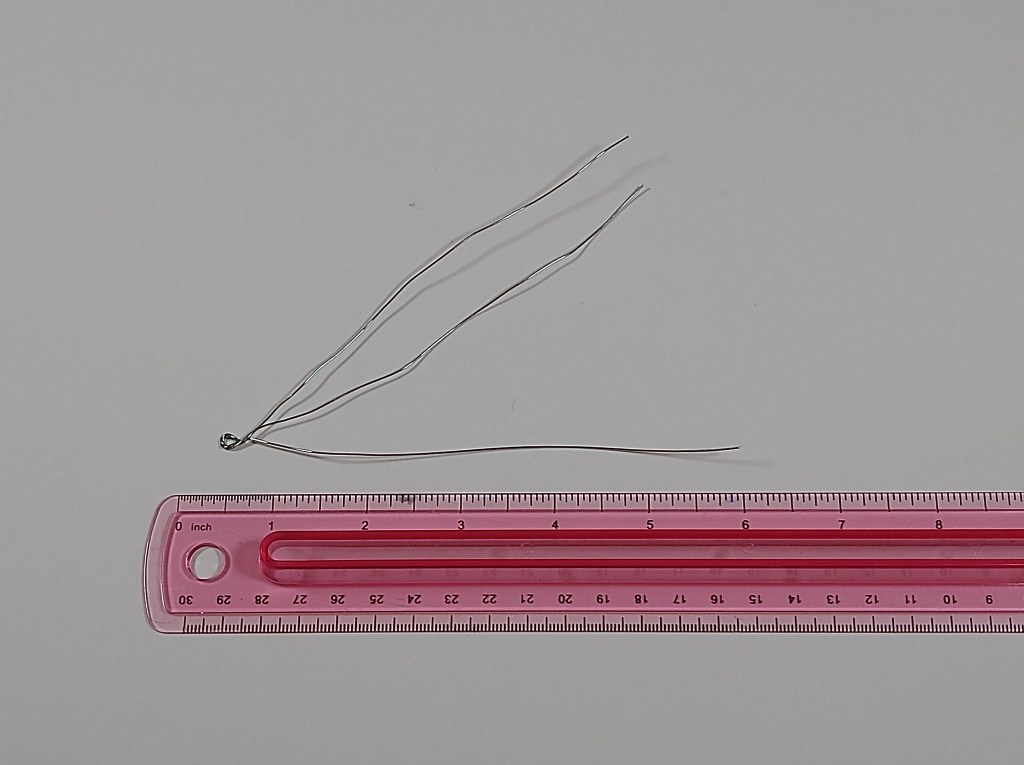
- Beading Wire: I used 24 gauge wire, and I’m glad I did. The seed beads I used just fit on the wire. Any larger wire (lower gauge = thicker wire) wouldn’t have worked.
- Seed Beads, 2 mm: I absolutely love anything in multiple colors. Many seed bead packs start at 24 colors. I splurged and went for the 48 pack. For this design to work, I really wanted precise colors to complement each other. Hats off to folks with even more variety!
- Needle Nose Pliers: While the wire can often be bent by hand, pliers definitely come in handy for finishing touches and tight bends. Also, the wire can be sharp!
- Ruler: To measure the wire.
- Scissors/Wire Cutters: To cut the wire
My Process:
To start, I picked three colors that I thought would work well together. This is not as easy as it seems. I wanted to match a particular outfit, and have enough contrast so the beads didn’t blend together but still complemented each other. I tried a few different combinations before I found one that worked for me.
Next, I measured 6″ of wire, and cut three pieces the same size. This left enough extra to work with easily and cut off any excess at the end.
Then, I aligned the three wires at the end and twisted them together. I bent the wire ends with the pliers to form a hook,
Next, the fun part: I started stringing the beads! I strung one color bead per wire until each string of beads was about 4″ in length. After I had finished one wire and was working on the others, I bent the end of the wire down in a loop to prevent the beads from falling off.

After I had strung all the beads, I twisted the three wire ends together.
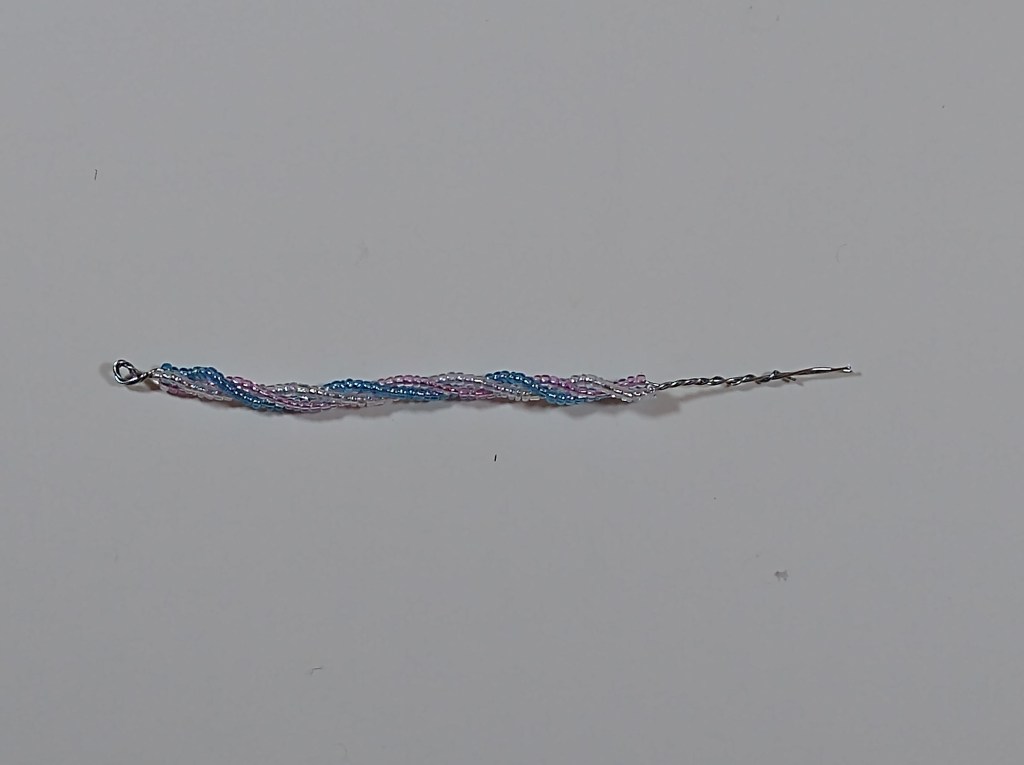
Now, I gently started to twist the three strands to create a spiral. I wanted a fairly tight spiral that showcased all the colors, but I didn’t want it so tight that I damaged the beads. About 3-4 turns seemed to do the job. As I twisted, I also started to shape the necklace into its final U-shape.
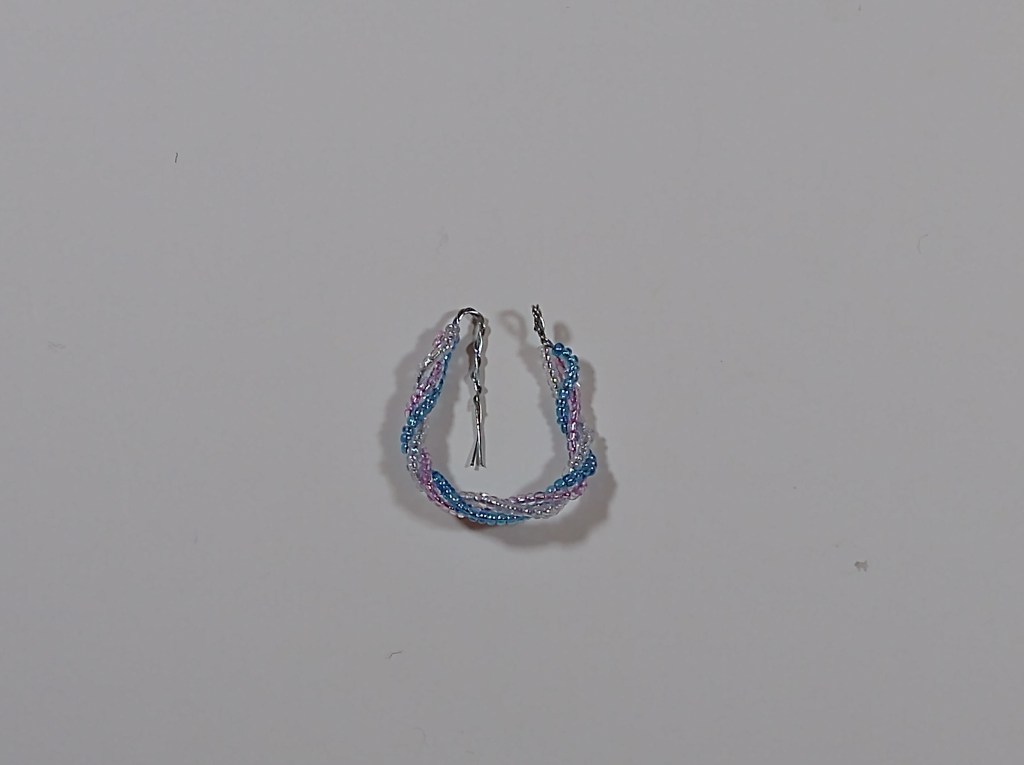
I then cut off the excess wire, leaving 0.5″ on the end. I bent that piece into a hook to catch the one I made earlier on the other side.
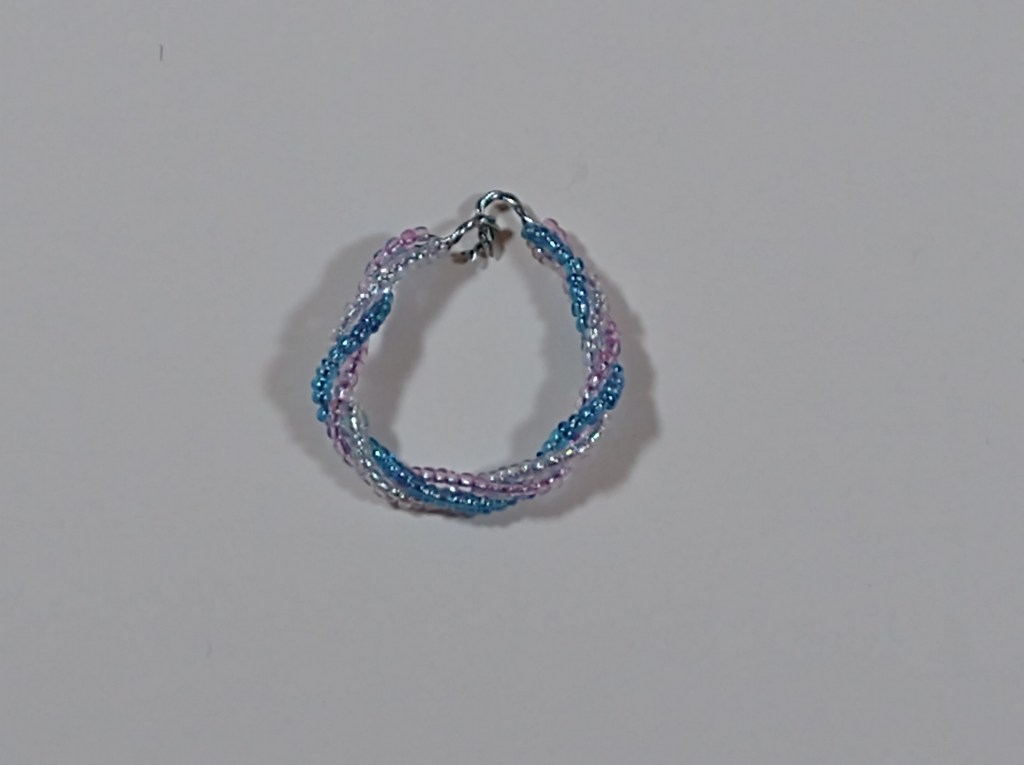
I’m quite happy with how mine turned out. Hope this was helpful, and happy crafting!

![DIY Mini Egg Chair Swing Stand [6:1 Fashion Doll Scale]](https://makeitmyowncrafts.com/wp-content/uploads/2025/05/snapshot-6.jpg?w=1024)
![DIY Mini Egg Chair Cushion [6:1 Fashion Doll Scale]](https://makeitmyowncrafts.com/wp-content/uploads/2025/05/snapshot-5.jpg?w=1024)
![DIY Mini Egg Chair Swing [6:1 Fashion Doll Scale]](https://makeitmyowncrafts.com/wp-content/uploads/2025/05/img_20250525_114014199.jpg?w=1024)
![DIY Mini Garden Bench [6:1 Fashion Doll Scale]](https://makeitmyowncrafts.com/wp-content/uploads/2025/05/img_20250519_191541270.jpg?w=1024)
![DIY Mini School Window [6:1 Fashion Doll Scale]](https://makeitmyowncrafts.com/wp-content/uploads/2025/05/img_20250520_115912364.jpg?w=1024)
![DIY Mini Split-Rail Fence [6:1 Fashion Doll Scale]](https://makeitmyowncrafts.com/wp-content/uploads/2025/05/img_20250518_105522853.jpg?w=1024)

Leave a comment